Meal prepping is a game changer when it comes to saving time, staying on track with healthy eating, and reducing stress during the week. By planning and cooking your meals ahead of time, you can enjoy nutritious, home-cooked dishes without the daily hassle of figuring out what to make. Whether you’re new to meal prepping or just looking for ways to streamline your process, this guide will walk you through everything you need to know, from planning and cooking to storing and reheating your meals.
1. Why Meal Prep?
Meal prepping offers numerous benefits, including:
- Time-saving: Cooking all your meals at once means you won’t need to spend time cooking daily.
- Healthy eating: You can control ingredients, portion sizes, and nutritional content, ensuring balanced meals.
- Cost-effective: Buying ingredients in bulk and preparing meals in advance helps you avoid last-minute takeout or unnecessary grocery runs.
- Less stress: With meals ready to go, you don’t have to think about what to cook when you’re tired or in a rush.
2. Step-by-Step Guide to Meal Prep
Step 1: Plan Your Meals
The first step in meal prepping is to plan out your meals for the week. Start by deciding how many meals you want to prep—breakfast, lunch, dinner, and snacks—and make a list of your favorite meals that can be easily prepared in bulk. Here’s how to plan:
- Choose recipes that store well: Opt for dishes that stay fresh when stored in the fridge or freezer, like stews, stir-fries, casseroles, salads, and grain bowls.
- Balance your meals: Aim to include a variety of proteins (chicken, tofu, beans), vegetables, healthy fats, and whole grains in each meal.
- Consider dietary needs: Make sure to choose meals that fit your dietary preferences or restrictions (gluten-free, vegan, low-carb, etc.).
- Use leftovers wisely: Plan meals that can be repurposed. For example, roasted chicken can be used for salads, wraps, or grain bowls.
Example Meal Plan:
- Breakfast: Overnight oats with chia seeds and berries
- Lunch: Quinoa salad with chickpeas, veggies, and lemon-tahini dressing
- Dinner: Chicken stir-fry with brown rice and vegetables
- Snacks: Hummus and carrot sticks, protein bars, mixed nuts
Step 2: Make Your Shopping List
Once you’ve planned your meals, create a shopping list with all the ingredients you’ll need. Organize your list by category (produce, protein, grains, dairy, pantry staples) to make the shopping trip quicker and more efficient.
Tip: Stick to your list to avoid impulse buys and ensure you have everything you need for the week.
Step 3: Prep Your Ingredients
Now that you’ve got your ingredients, it’s time to start prepping! Here’s what to do before you start cooking:
- Wash and chop vegetables: Wash and chop all your veggies for the week. Store them in airtight containers in the fridge for easy access.
- Cook grains: Prepare grains like rice, quinoa, or couscous in large batches. These can be stored in the fridge and used throughout the week.
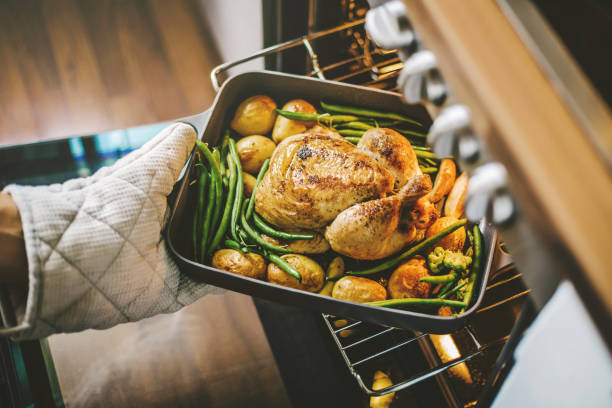
- Prepare proteins: Cook proteins such as chicken, beef, tofu, or beans. You can roast, grill, or sauté them in advance.
- Make sauces or dressings: Prepare any sauces, dressings, or marinades ahead of time. For example, a batch of vinaigrette or a batch of curry sauce can be made and stored for easy use.
Tip: If you don’t have much time, try cooking larger portions of protein and grains and using them for multiple meals.
Step 4: Cook in Batches
Now, it’s time to start cooking! When meal prepping, batch cooking is key. You’ll be cooking multiple meals at once to save time and energy. Here’s how to efficiently batch cook:
- Cook multiple dishes at once: Use all your burners and the oven to make the most of your cooking time. For example, you can roast vegetables while cooking grains on the stove or making a stir-fry.
- Don’t forget about the slow cooker: A slow cooker or Instant Pot can help you make large portions of soups, stews, or chili, which can be stored for several days.
- Season and store: Season your dishes while cooking, but consider keeping certain elements (like sauces or dressings) separate so they stay fresh longer.
Example: Roast a big batch of sweet potatoes, grill some chicken, and cook rice—all at the same time in different pans.
Step 5: Store Your Meals
Once everything is cooked, it’s time to store your meals. Proper storage is key to keeping your meals fresh throughout the week.
- Use airtight containers: Store individual portions in airtight glass or plastic containers. Glass containers are great for keeping food fresh and are microwave-safe.
- Label your containers: Label your containers with the name of the meal and the date it was prepared. This will help you keep track of freshness.
- Store in the fridge or freezer: Meals that will be eaten within 3-4 days should be stored in the fridge. If you want to prep for longer, freeze meals in individual portions for up to 3 months.
Step 6: Reheat and Enjoy!
When it’s time to eat, simply grab your prepped meal and reheat it. To ensure your meals stay flavorful:
- Use the microwave, stovetop, or oven: For even reheating, try using the stovetop or oven. Microwaving can sometimes result in uneven heating.
- Add fresh toppings: To refresh the meal, add fresh elements like herbs, avocado, or a squeeze of lemon to enhance flavor.
- Repurpose leftovers: If you have extra ingredients, you can create new meals. For example, leftover roasted vegetables can be tossed into a grain bowl or made into a soup.
3. Meal Prep Tips and Tricks
- Start small: If you’re new to meal prepping, start with prepping lunches or dinners for 2-3 days and gradually increase the number of meals as you get more comfortable.
- Mix up your meals: To avoid getting bored, switch up your meals each week or experiment with different seasonings and ingredients.
- Prep snacks: Include healthy snacks in your prep, like chopped veggies with hummus, homemade protein bars, or hard-boiled eggs.
- Don’t forget breakfast: Overnight oats, smoothies, and egg muffins are great make-ahead breakfast options.
- Incorporate leftovers: Repurpose leftovers for lunches or dinners later in the week to save even more time.
4. Sample Meal Prep Plan
Here’s a simple meal prep plan to get you started, including recipes for each meal:
Breakfast: Overnight Oats with Berries
- Ingredients: Rolled oats, almond milk, chia seeds, honey, fresh or frozen berries
- Instructions: Combine oats, chia seeds, and almond milk in a jar. Stir in honey and top with berries. Refrigerate overnight.
- Prep Tip: Make 4-5 jars at a time to cover a few days.
Lunch: Chicken Quinoa Salad
- Ingredients: Grilled chicken, quinoa, cucumber, cherry tomatoes, red onion, feta cheese, olive oil, lemon, salt, and pepper
- Instructions: Combine cooked quinoa, chopped vegetables, grilled chicken, and feta. Drizzle with olive oil and lemon juice.
- Prep Tip: Store the dressing separately to prevent sogginess.
Dinner: Sweet Potato and Black Bean Stir-Fry
- Ingredients: Roasted sweet potatoes, black beans, bell peppers, onions, cumin, chili powder, cilantro
- Instructions: Stir-fry bell peppers and onions with spices, then add roasted sweet potatoes and black beans. Top with fresh cilantro.
- Prep Tip: This dish stores well in the fridge for 3-4 days.
Meal prepping can seem daunting at first, but once you get into the rhythm of planning, cooking, and storing your meals, it becomes second nature. By dedicating a few hours to prep your meals, you’ll save time, money, and stress throughout the week. Whether you’re prepping for a busy workweek, trying to eat healthier, or just want to make your life easier, meal prep is an invaluable tool for achieving your goals. Happy prepping!